Showing posts with label Christmas 2018. Show all posts

Thursday, December 20, 2018

Snowman and Robin | Whimsy Stamps

Hello my dear friends.  I have been pretty much absent these days as I unfortunately am taking a while to get over the flu.  I am now feeling more myself and am back to share this absolutley sweet image and project with you.  As this is a digial image, you can definely still have the time to get it and turn it into a Christmas project for this year. That is what I love about digital stamps!

The image was sized to fit an A2 sized card and then printed on Neenah Solar White Cardstock.  I colored it up with Copic markers and then fussy cut it.  I created a snow bank using one of the dies from the set and the background and sentiment are also digital images from Whimsy! It was quick and easy and I love that I could quickly get all the products I needed in a flash!

Snowmand and Bird Digital Stamp

Snowman and Bird - Digital Stamp

 Christmas Azure Digital Paper

Christmas Azure Papers - Digital Papers

Wavy Edgers Die Set

Wavy Edgers Die Set

 Christmas Sentiments Digital Set

Christmas Sentiments - Digital Sentiments

Copic Markers:

Snowman: BG000, BG0000, C1, C3, C00, 0

Nose: Y32, E99, R05

Arms: E31, E33, E35

Hat: C9, C7, C5,C3, C1, R29, R17, R05

Scarf: R29, R17, R05, C1, C3, YG17, G48

Robin: R05, R17, R29, E99

Enjoy these last days before Christmas!

Hugs Jeanette


Thursday, November 29, 2018

Christmas Fairy & Star | Interactive Card

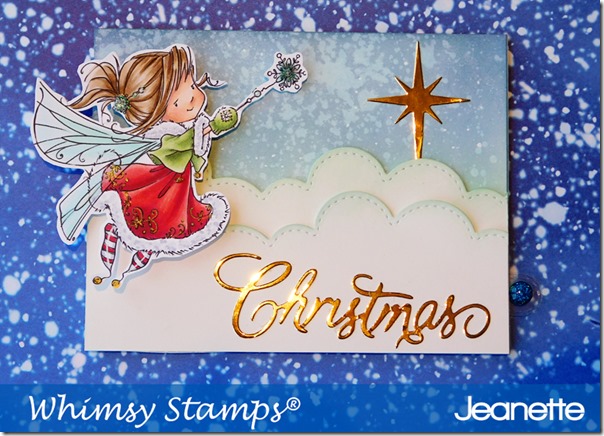
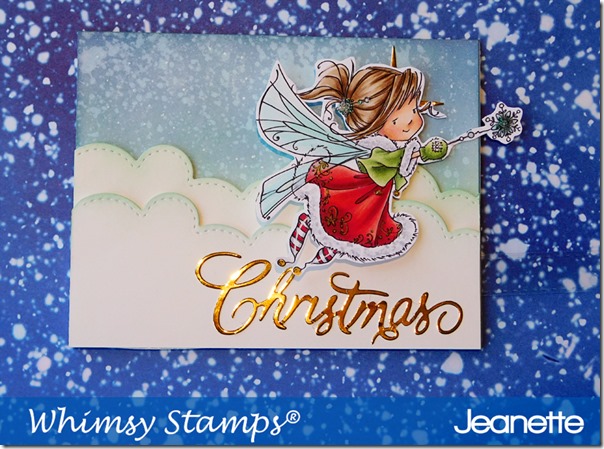
Happy Thursday! I have a brand new video and project to share with you today! Once again I have used Whimsy Stamps Kinetic dies to create an interactive component to my card.  When I started to think about how I wanted this card to look, I pictured this sweet image; Snowflake Wishes flying through the clouds. 

In the video, I will share the coloration of this image as well as share how I put the components together to create a slider for the image to move back and forth.  It may seem complicated but it really isn’t!  The cloud die was the perfect tool to create some panels to hide the slide components.  I sponged the diecuts lightly with some distress inks.

The background was created with Distress inks that were sponged onto the cardstock and then furthure distressed by spritzting the surface with some water using the Distress sprayer.  Adding the touch of shiny gold by using metallic foil paper really competed the card.  The star was a last minute addition.  The card needed something up in the sky so that it didn’t look so empty.

Little touches like adding white highlights to the image and adding glitter drops to small areas really elevates the final look of the project.


Video Tutorial:
Click HERE to view in HD format

Supplies:

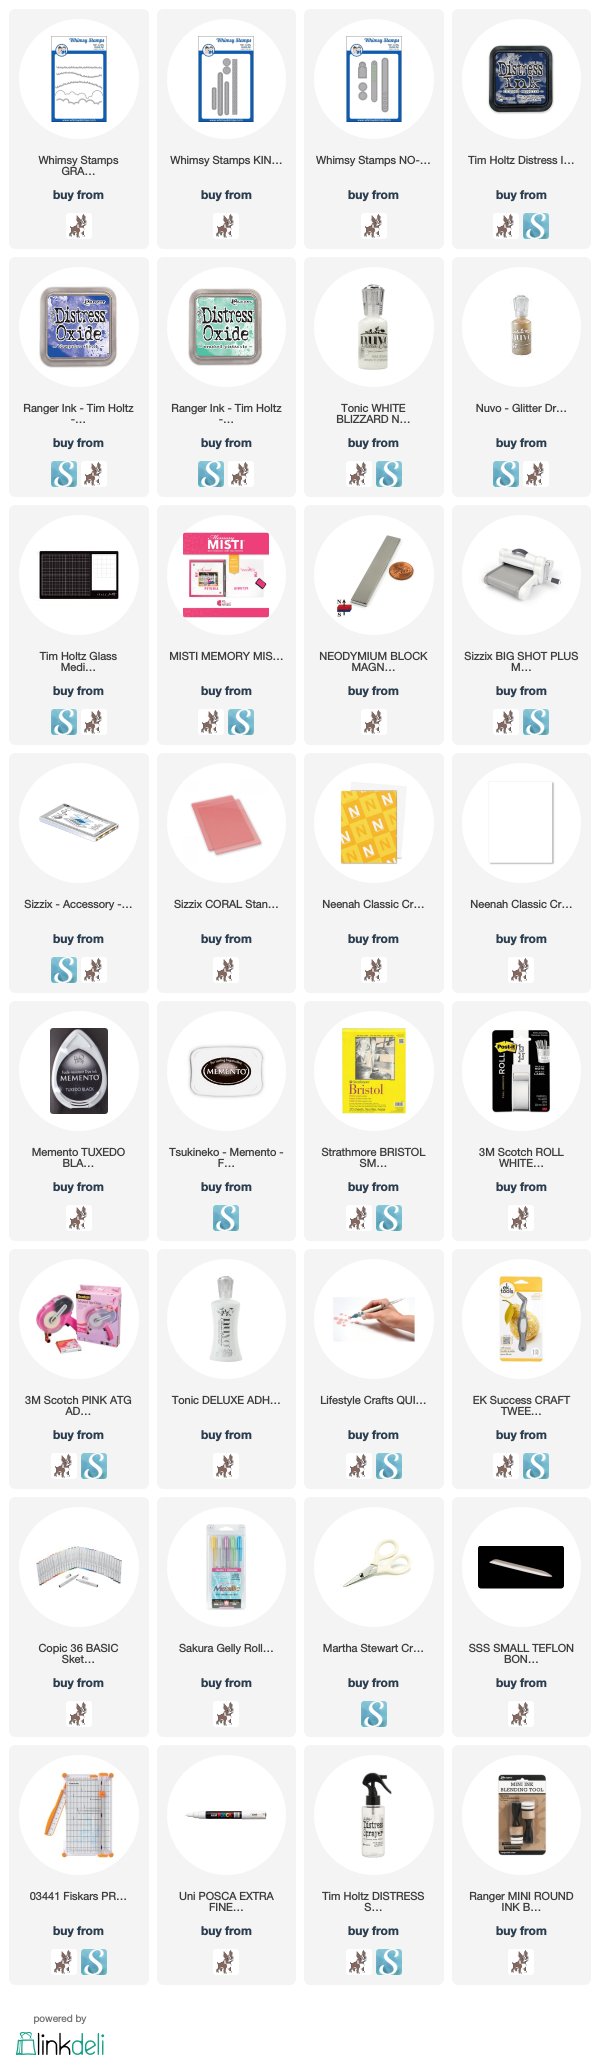
Snowflake Wishes Fairy Rubber Stamps

*NEW Snowflake Wishes Fairy Rubber Cling Stamp


Christmas Large Word Die

Christmas Large Word Die


No See Kinetics Basics Die Set

*NEW No-See Kinetic Basics Die Set

Kinetic Straight Basics Die Set

*NEW Kinetic Straight Basics Die Set


Grass and Cloud Edger Die Set

Grass and Cloud Edger Die Set


Copic Markers

Skin: E000, E00, E11, E04, R30, R20

Hair: E40, E42, E44

Coat: G40, G43, G46

Fur Trim: C3, C1 C00

Skirt: R30, R32, R35, R37, R39

Wings: BG000, BG11

Stockings: C3, R37

Bells: YR21


Distress Oxide: Cracked Pistachio, Blueprint Sketch

Distress Ink: Chipped Sapphire

Thanks for stopping by!

Hugs Jeanette

Wednesday, November 21, 2018

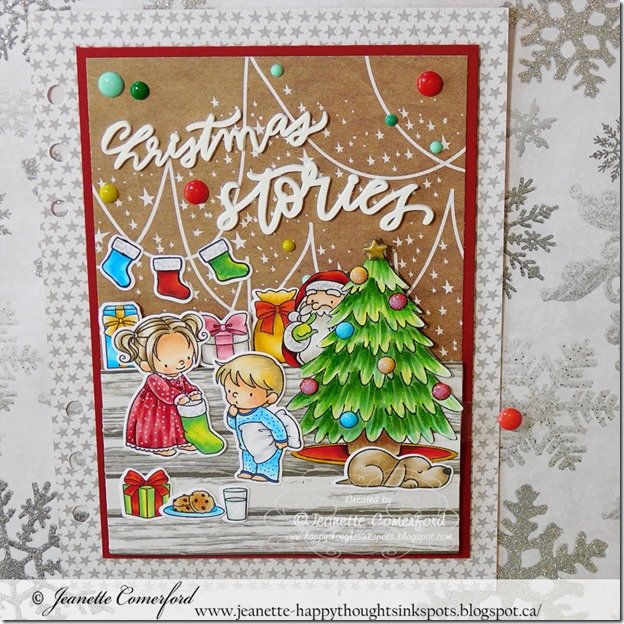
Christmas Series 2018 _ Day #9 Little Secret Santa

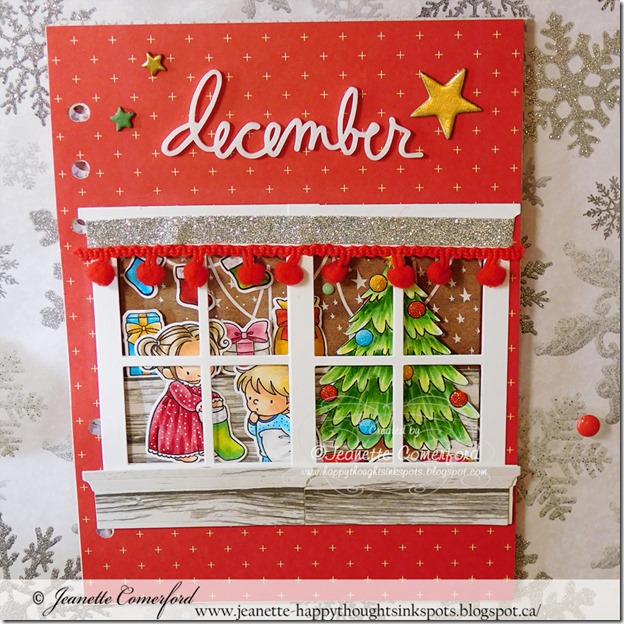
Happy Wedensday!  I am bakc to share the ninth video in my 2018 Christmas Series!  This one took a while to create and then to edit the video but I am so happy with the way this turned out.  Originally, I was inspired by this project that I created last year for my December Daily album. It is still one of my very favorite projects! When I saw these new images from MFT Stamps, I knew that I had to create this scene for my album this year! Once again, this project is a mix of old and new products from different companies that somehow all come together to look like a perfect match-up!

I had planned on creating a double-paned window so that we could peek in and see both the children and Santa hiding behind the tree.  I then had the idea to add Whimsy Stamps new Kinetic Dies so that I could have a hidden slider incorported into the page for a super cute surprise!  I think this is such an awesome way to add an interactive component to an album page or a card!

In the video, I will take you through the steps of making both pagers and include tips and tricks to adding the slider component to the page. Once you see how it is done, you will realize that it is actually pretty easy! I don’t include all the coloration in the video….it would have been way too long!  I do, however show how to color up the tree and all the copic markers that I used for the rest of the images are listed below!  Just check any of my coloration videos to see my coloring technique!

Video Tutorial:
Click HERE to view in HD format

Supplies:


No See Kinetics Basics Die Set

*NEW No-See Kinetic Basics Die Set

Kinetic Straight Basics Die Set

*NEW Kinetic Straight Basics Die Set


Copic Markers Used:

Skin: E000, E00, R00, R20

Hair Little Girl: YR30, E42, E43

Hair Little Boy: YR30, YR31, E41

Dress: R00, R81, R83, R85, R89

Blue: B00, B02, B04

Yellow: YR30, YR21, YR24

Red: R17, R27, R29, YG99

Green:YG21, YG13, YG63

Pink: R81, R83, R85

Grey/Santa’s Beard: W00, W1, W3

Tree: YG21, YG13, YG63, YG17,g12

Dog: E40, E41, E42, E43, W7, W5

Pillow/Stocking & Fur Trim: 0, C00, C1, C3

Cookies: E30, E31, E33

Thanks for stopping by!

Hugs Jeanette

Tuesday, November 20, 2018

Christmas Polar Bear & Seal

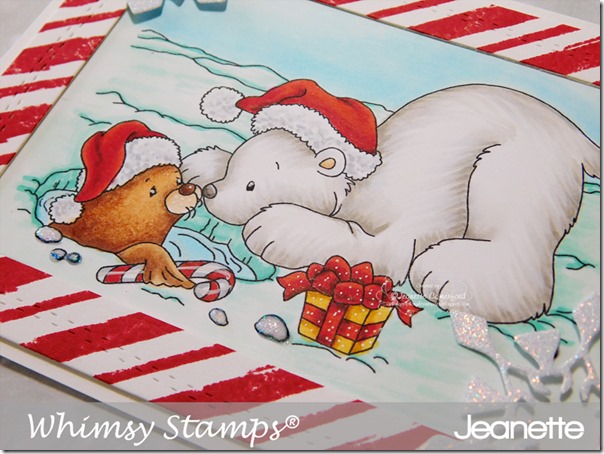
Happy Tuesday!  I wanted to share this Christmas card that I made using some new and some older Whimsy Stamps products.  I love combining the new and the old together!

The focal image is the new Polar Bear and Seal Rubber Stamp which I stamped onto Neenah Solar White paper and colored up using Copic Markers.  You can find the exact marker numbers I used listed below.  I added some sparkle by using some Nuvo Glitter Drops in White Blizzard.  It also adds a little bit of dimension at the same time.

To create the fun stiped border, I first stamped some Neenah cardstock with the  Brushed Stripes Background Rubber Stamp and red ink.  I then die cut it using the Shaker Maker Rectangular Die Set.  I love that it gives a candy cane effect. Finally, I die cut some glitter cardstock using the Elegant Snowflake Die Set.  This is one of my go-to sets when I want to add some embellishments to my Christmas cards.


Polar Bear and Seal Rubber Stamp

*NEW Polar Bear and Seal Rubber Cling Stamp

Brushed Stripes Background Rubber Stamp

*NEW Brushed Stripes Background Rubber Cling Stamp

Shaker Maker Rectangular Die Set

Shaker Maker Rectangle Die Set

Elegant Snowflake Die Set

Elegant Snowflakes Die Set


Copic Markers:

Polar Bear: W3,W1,C1,C00, 0, E11, E00

Hat:  R35, R37, R39, YG99, C3, C1, C00

Present: R37, R39, YG99, YR31, YR24

Seal: E21, E23, E25, E27

Ice: G0000, BG11, BG13

Sky: B000, B00


Thanks for stopping by! Be sure to check back tomorrow for another project from the Whimsy Stamps Design Team! Have a great day.

Hugs Jeanette xxo

Tuesday, November 6, 2018

Christmas Series 2018 | Day #8 Little Reveal Wheel


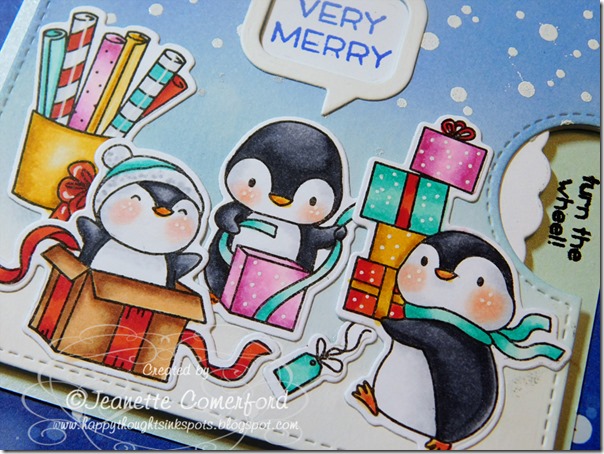
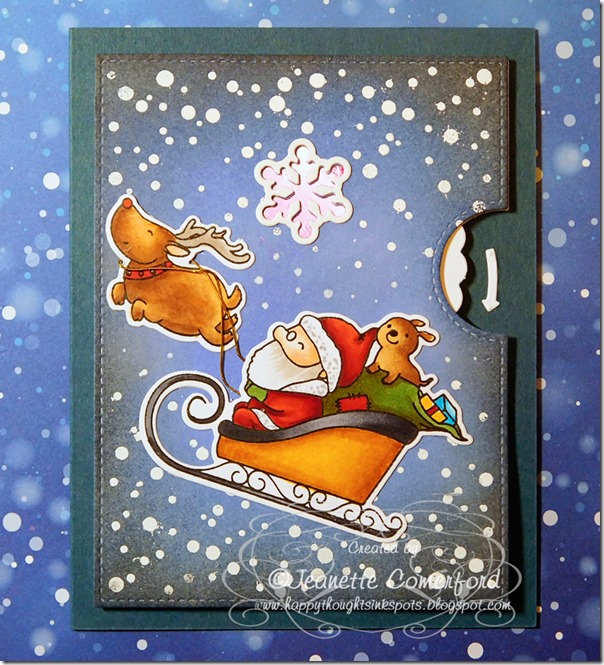
Happy Tuesday! Hope your week is off to a great start!! Have you started thinking about decorating and shopping for Christmas?  I start pretty early but I think that is because I am a blogger and I have to get my content ready way before the season starts!  Today’s card set and video tutorial took a long while to film and edit!  I am absolutely crazy about the interactive effect that the Lawn Fawn Reveal Wheel adds to a card.  I think that everyone will be super happy to get one of these in the mail this holiday series!


I CANNOT get enough of these cute penguins! They certainly look like they are very hard working….well maybe that little guy in the box is playing more than working, but he is a cutie!


Using the same set but creating a different look. I added less images and switched up the backgroud inks colors and the appperature shape.

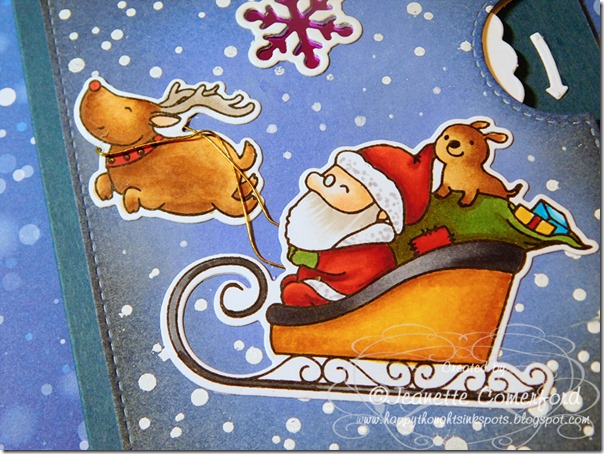
Did you see THIS POST?  I used this set to create a totally different take on Santa, his sled and the reindeer.  I mentioned in my video tutorial that I was planning on making one featuring an iconic night sleigh scene…..here it is! I am super happy with how it turned out!


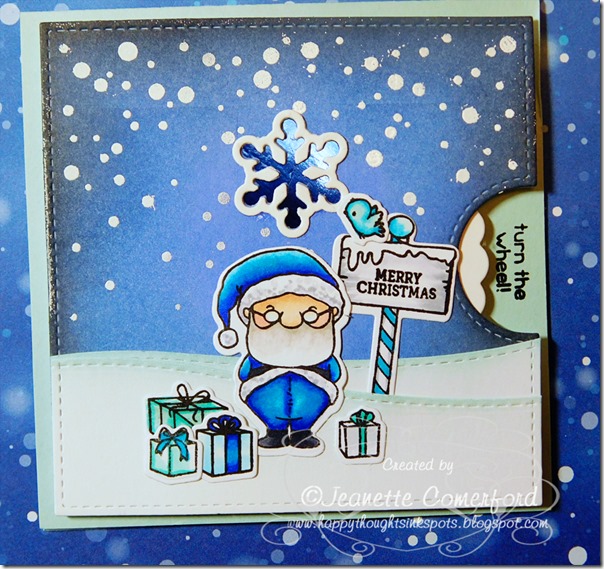
Finally, I used other images from the Santa Sleigh set to create this card.  I thought Santa might want a change and so I gave him a lovely blue suit. Hope he likes it!!!


Video Tutorial:
Click HERE to view in HD format

Supplies:


Copic Markers

Penguin: C7, C5, C5, C3, C1, 0, R00, R20, YR21, YR18

Pink: RV00, RV63, RV66

Aqua: BG13, BG11, G0000

Blue (bird & packages): B000, B00, B01

Yellow: YR30, YR31, YR24

Red: R17, R27, R29, YG99

Fur trim: C3, C1, C00

Santa Face: E000, E00, E11, R30, R20

Santa Beard: W3, W1, 0

Santa Suit: B00, B04, B66

Boots/Belt: C7, C5

Reindeer & Dog: E21, E23, E25

Antlers: E30, E31, E34

Sack & Mittens: YG63, YG97, YG99

Sleigh: YR30, YR31, YR24, C7, C5, C3

Signpost: C1, C00, 0, B02


Thanks for stopping by! I hope you are enjoying the Christmas Series so far!!

Hugs Jeanette xxo


Thursday, October 25, 2018

Christmas Series 2018 | Day # 7 Welcoming Santa

Happy Thursday! The week is just flying by! I hope yours has been a good one and that you are finding a little crafty time of your own!

I have the seventh card and video in my 2018 Christmas Series to share with you and I am just so super excited for you to see it!  When I first saw this gorgeous stamp set from Mama Elephant, I immediately pictured a dark blue sky and Santa’s sleigh flying up among the stars.  Then I thought that I’d like to change it up just a wee bit. How about a lovely pink sky at dawn and Santa being welcomed home by some pretty excited young reindeer. They are too young to fly with Santa yet but are super happy to race alongside his sled once he arrives home!

DSCN3915-copy_thumb1


DSCN3916 copy_thumb[1]

I changed up my normal go-to ink colors for Abandoned Coral and Cracked Pistchio Distress inks and I am in love with this color combo! I am sure to be using it some more this season because it is so striking against the red in Santa’s suit and sleigh!  I take you through the whole card making process in my video so I won’t go too in depth here.  I wasn’t able to find the exact background stamp that I used for the snow (it was MFT Confetti Background stamp) but I have linked a very similar one for you in the product list.

DSCN3918 copy_thumb[1]


Video Tutorial:
Click HERE to view in HD format

Supplies:

Copic Markers:

Skin: E000, E00, E11, R20

Beard: W3, 0

Glasses: G00

Red: R35, R37, R39, YG97

Fur Trim: C3, C1

Yellow: YR30, YR31, YR24

Green: YG21, YG23

Sack: E40, E42, E43

Dog: C3, C1, C00

Presents: YG17, BG23, R37

Reindeer: E31, E34, E30, E43, E41, R37, R35

Sign: C3, C1, G00, R35, R37


Thanks for stopping by!

Hugs Jeanette xxo

Monday, October 22, 2018

Christmas Series 2018 | Day #6 Penguin’s Bedtime

Happy day and Welcome to Day #5 of my 2018 Christmas Series. Today I have a very coloring heavy video to share with you.  I created this 6x8” insert page for my December Daily album.  It features digital images and digital pages, all combined to create a single layer page that has the feel of many dimensions.  It is one of my very favorite ways to create custom pages for my cards.  This could very easily be re-sized to fit an A2 sized card.


Video Tutorial:
Click HERE to view in HD format

Supplies:

Penguin Candle Light Set

Penguin Candle Light Set - Digital Stamp

Special Edition Penguin Candlelight Expanded

includes Bed Scene

*Special Edition Penguin Candlelight Expanded Set - Digital Stamp


Christmas Fun Digital Papers

 Christmas Fun Papers - Digital Papers


Copic Markers:

Penguin Face & Belly: W00, W1, W3, 0

Cheeks: R000, R00, R20

Peguin Body: W3,W5,W7,W9

Beak & Feet: YR31, YR18, YR24

Hat: G40, YG61, YG63, YG97

Slippers:C1, C3, E04

Candle: R08, R29, E07

Candlestick: YR30, YR31, YR24

Toy Penguin: C00, C1 C3

Mouse: C00, C1, C3, C7

Bed Sheet & Pillows: 0. C00, C1 , G00, BV0000, BG000

Comforter: G40, YG61, YG63, YG97

Blanket: R08, R29, E07, YG97

Headboard: YR30, YR31, YR24

Bedframe: E30, E31, E34, E34

Floor: E50, E51, E53, E40, E41, E42, E43, E44

Wall: 0, BG11, BG10, W1

Baseboard: W3, W1, W00

Thanks for stopping by!

Hugs Jeanette xxo


Tuesday, October 16, 2018

Christmas Series 2018 | Day # 5 Little Christmas Helpers

Happy Tuesday! I hope you are having good week! I had a bit of a crazy week last week and so I am a little later in getting this posted than I wanted.  I am so excited to share this card with you because I really LOVE how it turned out and I am automatically filled with festive excitement whenever I look at it! this is the fifth in my Christmas Series videos for 2018!

I am a sucker for Lawn Fawn stamp sets and when I saw the new Holiday Helpers stamp set, I immediately thought how perfectly it would pair with the previously released Christmas Dreams set! So, with that thought, I began to dream of the perfect holiday scene!  A sweet little elf couple busy wrapping Santa’s presents for everyone on his nice list. Here they are: cozy and comfortable in front of a roaring fire, with some sweet cocoa and a faithful hound snoozing in the corner.

I first diecut the Mama Elephant Madison Avenue frame from some Neenah cardstock and then started laying out all the various stamps.  This way I can visualize the scene and make sure that I am adding enough elements to create a nice balanced look!  I then created a textured wall and floor using some older supplies that have been much neglected.  I could not find the exact embossing folder and embossing plate but I found very similar ones that would create the same look.  They are linked below in the supply list.

There are a lot of images on this card and a whole lot of coloring went into it. I was very  mindful to use the same marker combinations to color all the reds and greens, etc. I think this makes the card look more cohesive.  I also added interest by having some of the elements extend past the confines of the border. I love how that looks! To add some glitter and shine, I added Nuvo Glitter drops to various elements. I am really suprised how much better I like these Glitter drops compared to my beloved Stickles.


Video Tutorial:
Click HERE to view in HD format

Supplies:


Copic Markers Used:

Skin: E000, E00, E11, R20

Hair Girl: YR30, YR31

Hair Boy: E34, E31

Fireplace: YR30, YR18, YR24, YR31, C3, C5,W1,W3,C1, W5

Red: R37, R35, R32

Green: YG17, YG23, YG21

Belt: C9, YR30, YR31

Fur Trim: C3, C1

Star: YR24, YR31

Tree: YG17, YG21, YG23, E34, E31

Dog: E30, E31, E34

Aqua: BG23, BG11, G00

Thanks for stopping by! Be sure to subscribe so as not to miss my next videos and post for my Christmas series! A new one is coming up in a few days!

Hugs Jeanette xxo

LinkWithin

Related Posts with Thumbnails