Showing posts with label Copic Marker Coloring Tutorial. Show all posts

Tuesday, April 6, 2021

Springtime Paper Folder

 Happy Tuesday! Hope you all had a lovely Easter weekend.  I shared this over on the Whimsy Stamps Blog and I also wanted to share this Springtime creation here on my blog as well.  I made a coloration video that shares how I used Copic Markers to color up this very sweet digital image. You will find it lower down in this post. If you want a tutorial on how I made this wallet, let me know in the comment section below!


I was inspired by the length of the papers in the Slimline Buttercup Paper pack to create a paper folder/wallet.  I then decorated it with the very sweet Love Me Not Mae Digital image as my focal image and a die cut using the Slimline Woodland Cottage Die.  This layout would also make an awesome slimline card.

I printed the image using my Epson printer onto Copic X-Pressit paper.

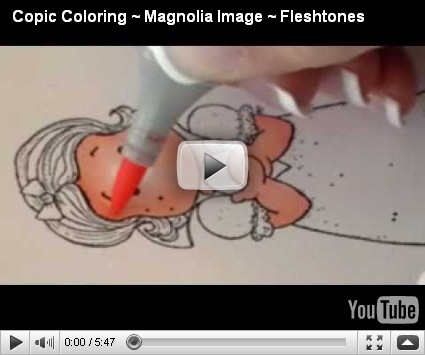
Here is the coloration video. You can view it on YouTube in HD HERE

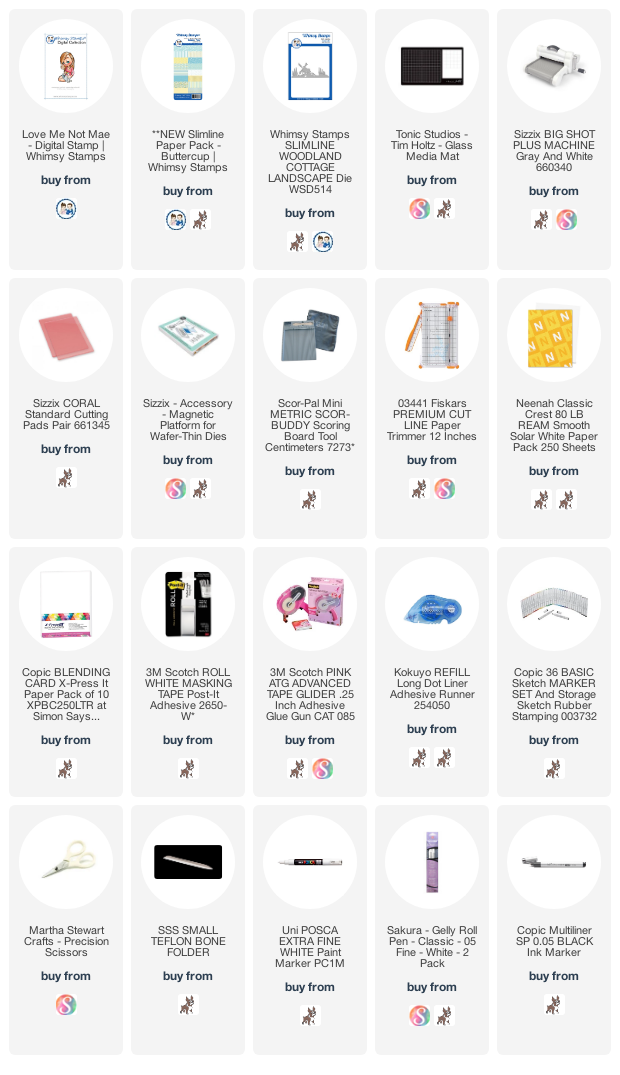
Supplies
Thanks so much for stopping by today!

Stay Safe
Hugs Jeanette xxo


Monday, April 3, 2017

Freesia Easter Bunny–Creating Backgrounds with Prismacolors

Happy Monday morning. I hope that your week is starting off well! I have a fun new card to share with you plus a how-to video. This is just in time for Easter and would make the perfect card to send out to a loved one!  This would even look great in a picture frame as part of your Easter decor. Which reminds me……I think it is time to get some of my decorations out from storage and start decorating for Easter. It still looks like winter outside my window but at least I can make it look like Spring inside!

The image that I used is Freesia and is illustrated by the fabulous Sylzia Zet. I adore her sweet and whimsical images. They have such personality. I colored the bunny with copics and in my video I share how I achieved this fuzzy look. It is super easy and fun to do.

I colored the back ground using Prismacolor pencils and Gamsol. I created depth my layering different shades over top of each other. I love the look that it gives. I even used Prismacolors to color up the die-cut letters so that they perfectly match in tone to my background. I think that these new Brush Script Uppercase die cut letters are amazing. They are whimsical and sweet and perfect for adding words to your cards and album pages! There are Brush Script Lowercase dies as well as Numbers available as well! Everything that you need!


Video Tutorial:
Click HERE to view in HD format

Supplies:

Copic Markers Used:
Bunny: 0, C00, C1, C3, C5
Ears, Nose, Cheeks, Paw Pads: E000, E00, R20
Tie: BG13, BG18
Tree Stump:E51, E53, E55
Flowers: YR30, Y21, Y28
Stem & Grass: YG61, YG63

Prismacolor Pencils Used:
Sky: PC904, PC1088, PC992, PC1012
Grass:PC913, PC1005
Eyes: PC1058


Thanks for stopping by!

Hugs Jeanette xxo

Monday, November 9, 2015

Whimsy Christmas Journal Page + Video

Happy Monday! I have officially morphed into Christmas mode and am starting to work on pages for my December Daily this year. Even if you don’t create a DD yourself, this project could be turned into a journal page or even a card….it is flexible that way!

DSC_0205

I used some pretty old patterned paper that has been in my stash for a good long while now. It is very traditional and I am sure you can find some very similar to it. I created a pocket on my page so that I can store a recipe or some memorabilia in there.

DSC_0206

The image is  newly released  and is from Elisabeth Bell’s Cottage Cuties collection from Whimsy. It is called Christmas Pudding.  I embellished my page using die cuts from Whimsy’s wonderful collection of dies. They dressed up my page just enough and I love to make my very own custom embellies that are exactly the right color and size for my page.

DSC_0207

Video Tutorial:
Please click HERE to watch this video in HD


Whimsy Supplies:

Christmas Pudding Rubber Stamp
*NEW Christmas Pudding

Wreath and Bow Die

Wreath and Bow Die

Elegant Snowflake Dies

*NEW Elegant Snowflakes Die Set

IMG_3595

Coptic Markers Used:
E000, E00, E11, R30 ,R20, R22
Hair: E40, E42, E44,
Red: R32, R35, RE7, R39
Green: YG11, YG61, YG63, YG67
Off-White: W00, W1, W3, 0
Pudding: E31, E33, W1, W3, 0
Tray: BG10, BG11
Cloth: YR31, YR21, 0
Puppy: E30, E31, E33
Berries: R39

Other Suppies:
White Sharpie Poster Paint Pen
Gold Wink of Stella Brush Pen
Mowed Lawn Distress Ink
Neenah Solar Crest White Cardstock
Memento Tuxedo Black Ink
Scotch ATG
Ranger Multi Matt Media
Big Shot

Thanks so much for stopping by today.I hope the rest of your day is a good one and stay tuned for my Christmas themed videos!

Hugs Jeanette xxo

Thursday, November 5, 2015

Digi Bells DT Card + Coloration Video

Happy Thursday! Today for my Digi Bell DT post I I have a new card as well as a copic coloration video with you.

For my card, I used the adorable digital image My Prince from Elisabeth’s Digital collection.

DSC_0211

The coloring was done with Copic Markers and the background was created using Prismacolor pencils and OMS (odorless mineral spirits). The numbers will be listed at the end of the post.

DSC_0212

My card was completed with the addition of some sequins and white dots.

DSC_0215

Video Tutorial:

Click HERE to see this video in HD

Copic Markers Used:
Skin: E000, E00, E11, R30, R20, R22
Hair: E50, E51, E53, E55
Dress: RV10, RV91, RV93, RV95, RV99, V000, V00, V01
Frog: YG11, YG61, YG63, YG67
Chocolate Box: E43, E44, E49, YR30, YR23
Rose & Hearts:  R20, R22, R24, R39

Prismacolor Pencils Used:
PC940 Sand
PC1072 French Gray 50%


Thanks for stopping by :) I hope you have a great rest of the day!

Hugs Jeanette xxo

Monday, October 27, 2014

Stamp and Create ~ Two Card Post!

Happy Monday morning my friends! I have two cards, a video and new release news to share with you, so I will get right to it!

DSC_8132 copy

I created this tag for the Stamp and Create with Magnolia challenge. This time around, we are challenged to use two different patterned papers. I used Santa Lucia Tilda as well as the Spruce tree ide and tons of frantage!

Here is a quick video I filmed while I was coloring!

To play along, please click the logo below. It will take you to the correct posting :)

Magnolia Update:

The new Magnolia Waiting for Christmas Collection and the Pink and Blue Ribbon Collection are in stock…but hurry before they are gone!

Here is my second card to share:
DSC_8136 copy

I used Ice-Beary Greetings from Whiff of Joy. You can snag it at a great price and it is super ADORABLE!

That is it for me! I still have to edit two more videos for my Mini Halloween Card series. I will have them up soon, I promise!

Thanks for swinging by!

Hugs Jeanette xxo

Friday, October 10, 2014

Mini-Halloween Card Series #2 Kitty Cat

Happy Friday! I am internally shouting “TGIF”!!! This has been a LONG week and I am happy, happy that this part of it is over. Now I am looking forward to the week-end filled with family, fun and Thanksgiving FOOD!

DSC_8096 copy

I am super happy to be able to share the next card and video in my Mini- Halloween Card series. Next up, just about the cutest kitty cat stamp I have seen!

DSC_8084 copy

This second card pairs up the Cat and the Hat (ha!) , landscape dies from Mama Elephant and a fun fence die from La-La Land Craft Stamps. I love how the proportions of all these elements are perfect for each other. I like being able to mix and match my products to create unique looks.

DSC_8090 copy

In today’s video, I am not sharing the actual putting together of the card. Instead, I take you through the stamping process I used to save time as I created this series of cards. If you would like to see if over at my YouTube channel, you can find it –> here.

Mini Halloween Cat suppliesThanks for stopping by. I will be sharing 5 more cards from this series. You can subscribe to my YouTube channel and or my blog feed  if you want to make sure you don’t miss any! Just click on them to do so!

Hugs Jeanette xxo

Tuesday, May 11, 2010

Just Magnolia Challenge ~ Two Stamps

Happy Tuesday! I am super excited to show you my card for today. As soon as I saw this sweet Tilda with Apple, she reminded me of Snow White. When I saw the Just Magnolia challenge I knew I had an opportunity to create a cute little scene with Snow White and her Prince! It was a little bit of work and took some time but I enjoyed every minute of creating it. I also made a video of how I colored Snow White Tilda. It is broken up into small segments to enable uploading to YouTube. Enjoy!

Whiff of Joy 2010 - Page 032 

Whiff of Joy 2010 - Page 034

Whiff of Joy 2010 - Page 033

I created an Easel card and added an acetate over-lay to the front of the card. Love the look of this. I stamped the sentiment onto plain acetate and adhered it so my panel that run across.

  • Stamps: Magnolia Fairytale Collection: Available -->here<-- at The Stamp Shoppe for my fellow Canadians, Oak tree from older collection
  • Ink: Memento Tuxedo Black
  • Paper: SU! Wild Wasabi, My Minds Eye DP, Fancy Pants overlay
  • Coloring: Copic Markers
  • Embellies: Yikes….none!

Here are my coloring videos. (My allergies were acting up so I apologize for the throat clearing and gravelly voice)

Just a heads up to my fellow Canadians. Heidi has received the Fairytale Collection plus more flowers and the new Magnlia Ink at her store The Stamp Shoppe. They are going really quickly so if you want them, you should get them now! She has also posted the May Challenge. You can read more about it -->here<--   and the May specials are 15% off all stamps in the 2008 Pink Collection and 2009 Pets and Animals collection (not including stamp combos), just use the coupon code: may2010

Thanks for stopping by and have a great day!

LinkWithin

Related Posts with Thumbnails